I have used the devotional features of PocketBible off and on over the last 20 years in my personal Bible reading. This year I’m using our free Old Testament in a Year and New Testament in a Year reading plans simultaneously to create a custom plan that will give me readings from both the Old and New Testaments each day.
One of the challenges of this approach is that I have to open the Old Testament plan, select the link to the passage, read the passage in the Bible (which may or may not default to the version I want to read from, depending on what else I’ve been doing in PocketBible since I last did my reading), then open the New Testament plan, select the link for the day’s reading, then read the New Testament passage from my preferred Bible. That’s a lot of jumping around just to read 3-4 chapters.
I’m going to take a slightly different approach to it to make the viewing of the text more pleasant and to make it easier to simply read the OT and NT passages without any jumping back and forth between the two devotionals and my Bible. I’ll have two-click access to each day’s text in my desired Bible regardless of what Bibles are open or active in PocketBible at the time. To accomplish this, I’m taking advantage of the “Autostudy Today” feature of the Advanced Feature Set.
Autostudy Today lets you collect the Bible passages and devotional passages you want to read for the day in an HTML or PDF file that can be viewed either within PocketBible or externally. It also lets you customize the styles that are used in the Autostudy output according to your preferences. Most people don’t bother with this, but I’m not most people. 🙂
If you don’t already own the Advanced Feature Set, it can be purchased as a subscription for $9.99/year. This particular feature is only available in the iOS, Android, and Mac OS versions of PocketBible. I’ll be using the Mac OS version to read from and to demonstrate these features, but the iOS and Android versions are similar.
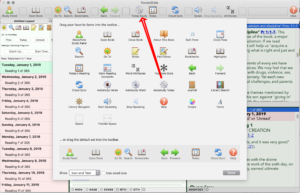
To make it easier to do this every day, I right-click on the toolbar, choose Customize Toolbar, then drag the Today Study button onto the toolbar. That will give me one-touch access to my reading each day.

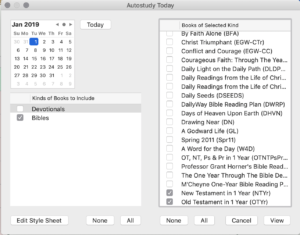
On the Autostudy Today screen I can select which books to include in the Autostudy report each day. Since the particular devotional book I’m using is just a reading plan and doesn’t itself contain any text I need to read, I’m going to un-check the Devotionals checkbox and make sure Bibles is checked.

Then I click on Devotionals (not the checkbox, but on the word “Devotionals” so that it is selected. This causes a list of all my installed devotionals to be displayed on the right. I choose the None button under that list to deselect all the devotionals, then find my Old Testament in 1 Year and New Testament in 1 Year reading plans and select their check boxes to include them in the Autostudy output.
Since I want my Old Testament reading to come first each day, I drag the Old Testement in 1 Year plan up above the New Testament in 1 Year plan. It doesn’t matter if there are other books in between, since they won’t be included. I just want to make sure the OT comes before the NT.

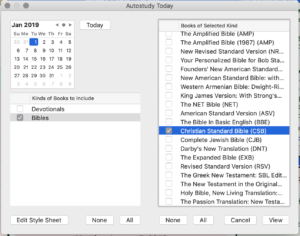
Now I select Bibles from the list on the left, causing my list of installed Bibles to be displayed on the right. Again I choose None to deselect all Bibles, then find the Bible I want to read from and select its checkbox. I’ll be reading from the Christian Standard Bible this year, so I select that one.

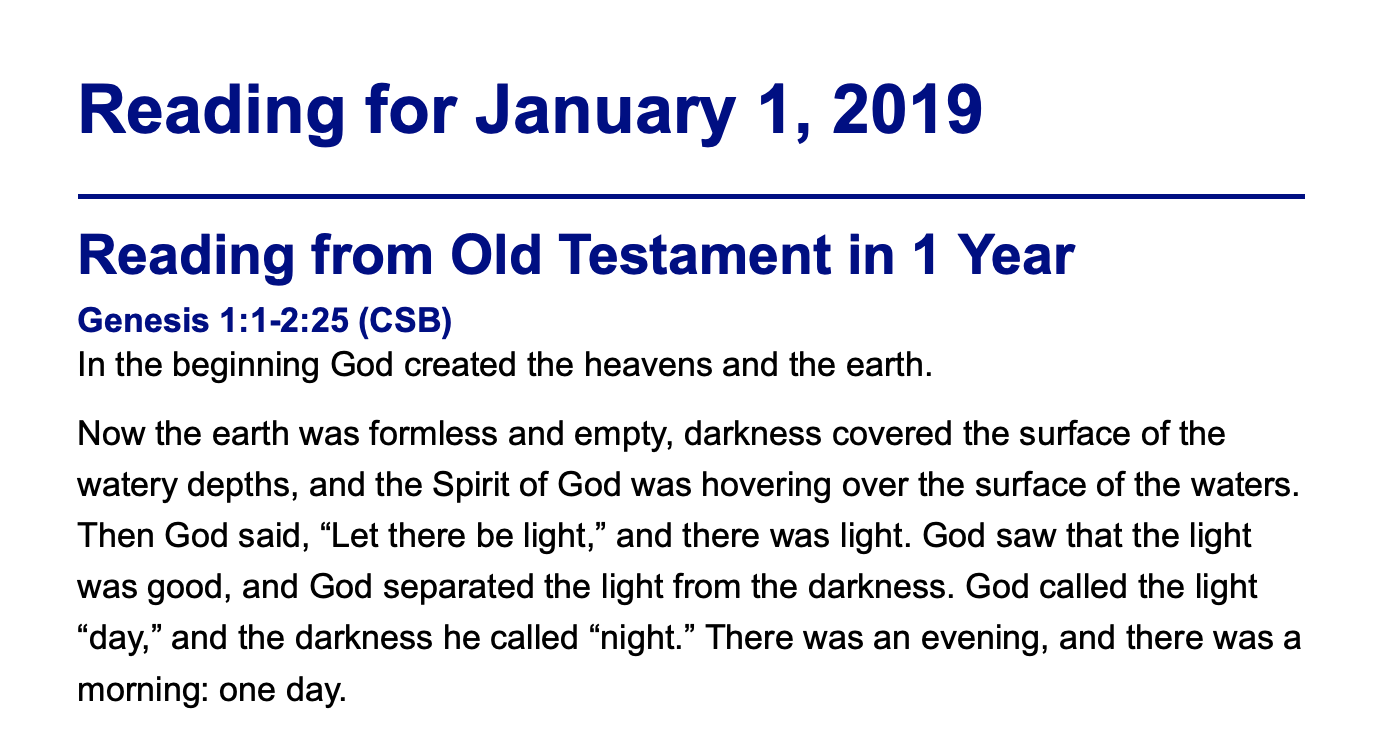
At this point I can test my output by selecting View. I’ll get the scheduled readings for whatever day happened to be selected on the calendar. The output looks just as I would expect, but I’m not entirely happy with it. I’m going to make a few changes to enhance the appearance of the text.
Take a look at the output so far: Autostudy January 1, 2019
Back on the Autostudy Today screen, I have an option to edit the “style sheet” for the Autostudy report. Don’t be embarrassed if this looks intimidating. Most people don’t know anything about editing Cascading Style Sheets. At the same time, don’t be afraid to try this at home. You can always reset it to defaults and start over if you mess something up.
The style sheet controls how every element of the Autostudy report is formatted. I want to make a number of changes to what my text looks like:
- Change the color of the Bible reference headings above each passage, and put them on a line of their own above the text instead of inline with the text.
- Add some additional leading between the lines of text.
- Make adjustments to how poetry is displayed.
- Suppress verse numbers in the Bible text.
To change the color of the Bible reference headings, I need to locate the line that looks like this:
div.bibleref {margin:0px 1em 0px 0px; padding:0; display:inline; float:left; color:#00c; font-weight:bold; font-size:100%;}
This line controls the Bible reference headings. By default, the text in a div element appears on its own line. PocketBible overrides this behavior by including display:inline in the style definition for Bible references. So I want to delete display:inline and the semicolon that follows it. I also delete float:left and the semicolon that follows that.
I’m not fond of the light shade of blue that PocketBible uses for Bible reference headings, so I change color:00c to color:008. This is a slightly darker shade of blue. I could instead change it to color:000 (or remove the color:00c attribute entirely) to make it black.
Next, I want to add some additional space between the lines (sometimes referred to as line leading). This is done by editing the entry that looks like this:
p {margin:0px 0px 0.5em 0px}
CSS style sheets use the line-height attribute to control line leading. A value of 100% is supposed to be “normal height”, and back in 2003 when I wrote my own HTML rendering engine, I made it work that way. But because the programmers who created the Web are not as smart as I, you actually need to set it to about 120% to get natural spacing for most fonts. I want a little extra space, so I’m going to set it to 150% by changing this line to read as follows:
p {margin:0px 0px 0.5em 0px; line-height:150%}
The p element is used for normal paragraphs in the Bible text. We also have poetry sections, for which PocketBible (arguably incorrectly) uses the blockquote tag to create extra margin on the left and right. There is no style specified for the blockquote tag in the default Autostudy style sheet (don’t ask me why; I don’t have an answer), so we just add the following line anywhere in the style sheet. I added it below the line for the p element, above.
blockquote {margin:0.5em 1em 1em 2em; line-height:120%}
This tightens up the line spacing a little bit in the poetry sections, and indents it a little more than normal paragraphs (about the width of one character).
Finally, we want to suppress verse numbers in the text. I happen to know that PocketBible uses the sup and small tags to superscript the verse numbers. Adding the following line to the CSS file (I added it below blockquote) causes superscripted text to be ignored:
sup {display:none}
That’s it! Once I save my changes to the CSS I’m ready to view the output.
Take a look at the final output: Autostudy January 1, 2019 – Formatted
All I need to do each day is choose the Today Study button from the toolbar, then press View to view my text for the day. I like to choose Print, then PDF, then Open in Preview to get a full-screen, PDF view of the text to read.
When I’m done reading, I mark today’s reading as complete in each of the OT and NT devotional books in PocketBible.
