December 16, 2024 — Update: Google reinstated PocketBible within a couple days of our re-complying with their re-request for information we had already provided.
December 9, 2024 — We were informed this morning by Google that they’ve removed PocketBible from the Play store, claiming we haven’t verified our identity. Never mind that we’ve had products in the Play Store for over a decade.
They’ve been asking us to jump through some verification hoops every couple of weeks for the last three or four months. Every time they ask, we jump through their hoop. Now they claim that there was no hoop and even if there were, we didn’t jump. So they’ve removed the app from the Play Store.
On Tuesday, August 29, 2023 we uploaded a new version of PocketBible for Android to Google Play (version 1.7.9, build 290). This is the first update in quite a while — we’re a little embarrassed to say it’s been about 5 years. Since the end of August we’ve uploaded several revisions — the latest being 1.7.15.
Because of the issues you’ll read about below, it was necessary to get this update released as soon as we could. As a result of jumping 5 Android versions (from version 8 to 13 — that’s “Oatmeal Cookie” to “Tiramisu” for those of you who follow Google’s cutesy naming system for their operating systems), we knew we would discover little things that would need to be fixed right away and so far that has indeed been the case. Updates are documented near the end of this article under “Phase 1”.
Why So Long?
I don’t want to make any excuses but I also want to be honest about what the situation is. You may know that the development team here is pretty small. We don’t have people assigned to each platform. We move from iOS to Windows to macOS to Android as needed. I originally developed our Android app, but pretty quickly passed it off to a more junior person. When that person left, I hired a replacement. About 5 years ago, that person left, too.
By then, the app was in pretty good shape and didn’t need a lot of updates. It had gotten to where I no longer knew my way around the code. And since I’m not an everyday user of the Android platform in the same way I am iOS, the operating system changed to where I no longer knew it either.
So when the Android app eventually needed updating I went to an Android programmer I knew who worked on it as a side gig for a few months. Eventually he took a different full-time job and couldn’t work on it any longer. So I found a really good contract developer who did a lot of the work to bring it into the 2020’s and get us almost up to Android 12.
And then this Bible thing happened…
Why Update Now?
If you’re a regular reader of this blog (that’s about 4 of you I think), you know that earlier this year we discovered a problem in the way Bibles are processed and stored for use in PocketBible. When we first wrote PocketBible, any time a new Bible was released we had to update the code in PocketBible and release a new version. This is because Bibles are very special and form the heart of how PocketBible works. That means any unique aspects of how they interact with other Bibles and with Bible reference books often has to be done directly in the PocketBible code.
So years ago we updated the Bible format PocketBible uses so that these unique aspects could be embedded into the Bible and not require PocketBible itself to be updated each time we released a new Bible. Turns out we didn’t go far enough. We have several new Bibles coming out that are just different enough that they couldn’t be published without updating every version of PocketBible. So we decided to stop what we were doing on the new Windows version of PocketBible and update every other version of the app. Then go back to the Windows version and update it, too, for this new format.
The macOS version with these changes was released a couple months ago. The iOS version is in beta.
And then this Google thing happened…
PocketBible Disabled on Google Play
Google decided late last year that if your app wasn’t built with the latest or next-to-latest version of their SDK, that you couldn’t be on Google Play. (It is more complicated than that, but that’s the net effect.) They said they were going to disable apps starting in May 2023. But they gave us the option to request an extension to August 2023, so we took it.
Then, after acknowledging we had until August, they said they changed their mind and they were going to pull the app in May.
We were right in the middle of macOS and iOS updates at the time and had been planning to get to Android before the end of August, so we have spent about 3 months explaining to people how to side-load PocketBible and bypass Google Play.
This forced us into a two-phase approach to making the Bible-format updates to the Android app. First, we needed to bring it up to date with the latest SDK. Google required version 31 compatibility, but version 33 is the latest so we went all the way to 33. Until that was done, it was pointless to start into the change for Bible files
Phase 1
Version 1.7.10 (September 2, 2023) addressed these issues:
If you were using an SD card to store your books, they seemed to have disappeared. The method of finding your SD card changed in a recent version of Android OS and PocketBible was looking in the wrong place. It should be able to find them now.
When using the dark UI theme, the list of books open in the active pane was displayed with gray text on a gray background. Similarly, the pop-up list of recently visited verses was similarly gray-on-gray.
The dark mode theme was inexplicably using a dark blue color instead of a black color for the top and bottom action bars. Turns out this change was introduced as a debugging tool by a contract developer and we kind of liked it so we left it in. You did not like it. We reverted to black and very dark gray for the action bar, bottom action/tool bar, pane tabs (AFS), and go-to-verse buttons.
An issue with viewing and saving Autostudy reports (AFS) was resolved.
Resolved an issue that caused the app to crash when “Buy/Apply Upgrade” was selected from the navigation menu.
Books that include the Laridian logo on the title page now use our newer blue and orange logo. In the process of doing this we fixed some previously unreported problems with displaying images.
In the process of doing this upgrade, the minimum supported version of Android OS went from 4.1 “Jellybean” up to 4.4 “Kitkat”.
Version 1.7.11 (September 7, 2023) addressed these issues:
We thought we had fixed Strong’s number searches but we hadn’t.
Title page logo image was not being displayed on newly downloaded or moved books.
Splash screen image was too tall on tablets in landscape orientation.
Changed the image on the login screen to the new Laridian logo.
Made internal changes related to how colors and styles are applied in the dark and light UI themes. There could be minor color changes as we seek to better organize the code in this regard.
Version 1.7.12 (September 20, 2023) addressed these issues:
Re-architected the process of launching the app to get control over the transition from the onboarding slideshow, registration reminders, and registration/login screens to the main book view.
Addressed a problem where deleting a book would remove it from the list but not actually delete the file.
Added new UI color schemes for AFS subscribers.
Minor changes to the default “Light” and “Dark” UI color schemes to improve general appearance.
Treat the legacy AFS and AFS subscription differently, since features are now different between the two.
Revert to “no AFS” if the user logs out of their account.
Show logged-in customer ID, feature set, and AFS expiration date in About box.
Get rid of boxes around bottom action bar buttons.
Style the audio and autoscroll context menu bars with rounded corners and slightly more transparency.
Added an option to control whether or not pane tabs show the book category (AFS). Only show the category when pane is inactive. Active panes always show abbreviation of active book.
Removed “Exit” from the action bar menu. This is a hold-over from when mobile operating systems did a bad job of managing memory when apps were left running. It’s 2023 and nobody exits apps anymore.
Don’t do the navigation menu animation demo. We all know there’s a slide-out menu on the left side of the app.
Updated Help to describe tabbed panes. Include info on turning on/off categories in pane tabs. Document new AFS features.
Version 1.7.13 (September 25, 2023) addressed these issues:
Restore “Journal” to the navigation menu for Legacy AFS owners. In 1.7.12 it accidentally required an AFS subscription.
Make standard “Dark” and AFS “Black” themes darker based on user feedback.
Adjust splash screen blue to match launch icon blue.
Add an option to disable linked-to verse highlighting.
Fixed some problems running on Android 4.4
Version 1.7.14 (September 28, 2023) addressed these issues:
If the user deletes the Users Guide then selects “Help”, it is automatically reinstalled from the app bundle.
Words of Christ could be unreadable or appear be displayed in the wrong color when certain highlight colors were used and “words of Christ in color” option was turned off.
Version 1.7.15 (October 6, 2023) addressed these issues:
Resolved an issue where bottom action bar was getting partially hidden (or over-compensated for) under certain circumstances related to pixel density:
Split screen
Side panel open
Note editor (or any time keyboard was showing)
Addressed several aesthetic issues when font size was set to its largest and smallest sizes in Android Settings and when “make everything bigger/smaller” was set to its extremes:
Pane tabs (AFS).
Note title above editor.
Go-to-date dialog for devotionals
Go-to-verse spinner and book/chapter/verse picker for Bibles.
Margin preference screens
Splash screen
Made the text color used for book titles on the library lists have more contrast.
More correctly position the autoscroll and audio toolbars in more circumstances (AFS).
Addressed further problems with saving and printing Autostudy reports (AFS).
Phase 2
The above just gets us to where we can start doing the work we came here to do. We need to port the C++ code that has already been implemented in PocketBible for macOS and iOS to Java for Android.
Beyond
Once we get this work done, we hope to more actively update the Android app. Admittedly, it has been a bit of a problem child over the years and we’ve let it get away from us. But more importantly, finishing work on this version will let us return our focus to PocketBible 3 for Windows, where we have to do it all again in yet another programming language.
While updating the Android version of PocketBible over the last couple of weeks, we took what we thought would be the non-controversial step of removing Exit from the action bar menu. In the light of some complaints, I thought I’d explain.
History
While the removal of the Exit function from PocketBible for Android seems abrupt and a step backwards in terms of giving users control over what’s going on on their device, the fact is that it’s the presence of the Exit function that is an anomaly.
Back in 1993-94 we experimented with Bible software on the Newton MessagePad. Including an Exit option on that platform was allowed, but the OS did a good job of managing memory without it and it wasn’t absolutely necessary.
Introduced in 1996, Palm OS discouraged apps from having a way to exit. It managed apps itself. Users weren’t supposed to think of “apps” so much as accomplishing a task. The idea of “launching” and “closing” were foreign to the “Zen of Palm”.
At about that same time, Windows CE was telling developers that mobile users didn’t need an explicit way to close their apps; the operating system would handle it. The app didn’t ever terminate itself; it was just told when it was about to be terminated, then it was terminated by the operating system.
iOS came along in 2007. Apple strongly discouraged developers from including any kind of exit functionality. Again, the OS managed memory better than the user could. Keeping apps around meant they launched faster.
Including the ability to exit an app was not recommended in Android (2008). Once again, the OS was better able to manage resources than the user.
So we come into last week’s decision to remove Exit from the action bar menu with a 30-year history of mobile operating systems discouraging or disallowing “exit” or “close” functionality in apps.
Benefits
The main advantage to the user of allowing the OS to manage running apps is that frequently used apps are more quickly and easily available.
Android facilitates this behavior by being able to intelligently decide which apps it should terminate to make memory or other resources available for the currently running app. It has ways of controlling how much CPU time is used by background apps so they can continue to work if necessary without affecting the responsiveness of the foreground app. (PocketBible doesn’t do any work when it’s in the background, but many apps do.)
Allowing Android to decide when to load and unload apps lets it more effectively manage battery life by minimizing loading activities and controlling background activities.
Android is able to predict which apps a user is likely to launch and keep them ready in memory as part of reducing launch time as described above. Similarly, it can terminate infrequently used apps when you’re done with them.
The Dark Secret
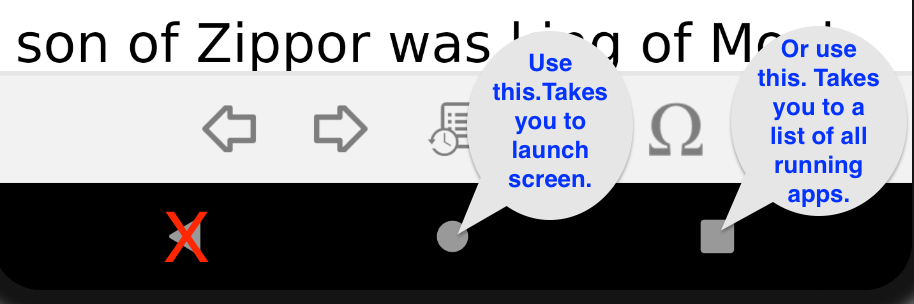
Don’t tell anyone, but that Exit option didn’t actually terminate PocketBible. What we did was programatically press the “back” button on the bottom of the screen while ignoring our own navigation history. So it was as if you had pressed “back” a dozen times to get past all the verses you had visited, then pressed it one more time to go back to the launch/home screen. We maintain your navigation history for your next session, of course, but internally that’s all we were doing.
Android has a “halt” method we can invoke to force the app to stop, but using it is strongly discouraged. It doesn’t allow for a controlled exit of the program and can cause data loss. So, yeah. Exit didn’t exit.
So How do I Exit the App?
Easy. You can exit PocketBible the same way you exit all your other apps, and with fewer screen taps than you were doing before. Just tap the “Home” button (or perform the “Home” gesture if that’s how you have it configured).
In other words, you could say we didn’t removeExit, we just moved it to the bottom of the screen and made it look like a little circle. Yeah, that’s what we did — we just moved it to make it more convenient.
Sometimes the things we think are obvious to the outside world aren’t.
In our last update, we explained in detail a problem we had encountered in the way that we encode Bibles for use in PocketBible. The TL;DR version is that we found it necessary to update every version of PocketBible, plus update the BookBuilder app, in order to accommodate necessary changes to the way we deliver Bibles.
As you know, PocketBible runs on four platforms: iOS, macOS, Android, and Windows. One of our points of pride is that PocketBible is a native app on each of those platforms. That is, we didn’t use a special tool that might allow us to create one app and run it on all platforms — we created separate apps for each. So when something like this comes up, we have to update PocketBible on all 4 platforms, and in this case, we also had to update our BookBuilder app.
We have a very small team of developers. We don’t have people assigned full time to each platform. So to work on one we pretty much have to stop work on others. That has meant that while we’ve been focusing on Windows, we haven’t been able to do much/anything on other platforms. It also means that if we need to work on iOS, macOS, or Android, we aren’t able to do much on Windows.
We kind of thought you guys all understood that, so we’ve been keeping you updated on our progress on the other platforms with the understanding that we would get back to Windows when these were done. Turns out that wasn’t clear. Hopefully now it is. Here’s where we stand on each of the other platforms with respect to this Bible format update.
BookBuilder and PocketBible for macOS
Because BookBuilder needed to be updated (of course) due to the Bible encoding changes, and because BookBuilder and PocketBible for macOS share so much code, we tackled both of these together. We did all the necessary changes to BookBuilder, then tested the output in PocketBible on the Mac.
While we were in the code, we did some necessary bug fixes and a few enhancements. We released PocketBible 1.4.2 on June 7, 2023 and it’s been pretty stable.
We did not release a new version of BookBuilder to the public because it’s possible we’ll discover problems related to the new format while working on all the PocketBible releases, and we’ll want to go back and make changes.
PocketBible for iOS
Version 4.16.0 went to a small group of beta testers about a month ago. Problems have been minimal and I anticipate we’ll approve it for the App Store soon. It incorporates the new Bible encoding changes and has a small number of improvements and quite a few little bug fixes.
PocketBible for Android
Android has been a challenge for a variety of reasons. Google changed the rules on us and required that we rebuild the app with the latest version of their tools for basically no reason. The app was working fine, but after telling us we had until August to upload a new version to Google Play, they decided to invalidate the app in May. This fell right in the middle of what we were working on for the other platforms. We opted to continue on our original plan of updating the Android app by the end of August. In the meantime, Android users were given instructions to side-load the app from our website and that worked fine.
PocketBible for Android has not been updated since 2018 and the changes required to get it compatible with the latest OS have been challenging. We released a build with minimal new features on August 29th and updates to fix some bugs on September 2 and 7. We anticipate at least one more small release to fix some additional issues; probably two more.
Once we get Android up to speed with Google’s new requirements, we’ll need some time to do the Bible encoding changes. This will involve porting a lot of code from the macOS/iOS apps and making sure it works. The Android app handles Bibles slightly differently from the other apps, so it’s not just a line-for-line translation from one language to the other, but rather it’s a concept-by-concept implementation using methods consistent with the way Android does things.
I’d like to tell you how long I think that’s going to take but I know I’ll just be wrong. Shouldn’t be too long, though.
PocketBible for Windows
Remember PocketBible for Windows? This is an article about PocketBible for Windows.
Once we get back to the Windows app I want to do a couple of things. First, I obviously need to port the Bible encoding changes from macOS/iOS into Windows. The JavaScript code in the Windows version follows the way the C++ code in macOS/iOS works pretty closely, so this should be easier than doing it in Android and Java. Second, while we’ve been working on getting the program finished, new versions of both Electron and VueJS have been released. We should refactor the app to use the new code so we’re not starting out already in need of an update.
We’re actually fairly close to having at least the standard features of the Windows app finished once we’re able to get back to it. There are some Advanced Feature Set features that haven’t been touched yet (Autostudy comes to mind).
Moving Forward with the “Native Apps on All Platforms” Plan in 2024
I want to take advantage of the fact that we’ve had to do recent re-releases of PocketBible on every platform and make it a goal to do some kind of small update to PocketBible on each platform every year. It’s easier to keep up with frequent, small changes than to have to absorb a massive number of changes to how to build and release apps when you do it every 4-5 years.
So that’s the status of PocketBible for Windows, told in terms of everything else that’s going on here. Anytime you see a blog article about any of the other platforms, count it as progress on the Windows app. 🙂
I have used the devotional features of PocketBible off and on over the last 20 years in my personal Bible reading. This year I’m using our free Old Testament in a Year and New Testament in a Year reading plans simultaneously to create a custom plan that will give me readings from both the Old and New Testaments each day.
One of the challenges of this approach is that I have to open the Old Testament plan, select the link to the passage, read the passage in the Bible (which may or may not default to the version I want to read from, depending on what else I’ve been doing in PocketBible since I last did my reading), then open the New Testament plan, select the link for the day’s reading, then read the New Testament passage from my preferred Bible. That’s a lot of jumping around just to read 3-4 chapters.
I’m going to take a slightly different approach to it to make the viewing of the text more pleasant and to make it easier to simply read the OT and NT passages without any jumping back and forth between the two devotionals and my Bible. I’ll have two-click access to each day’s text in my desired Bible regardless of what Bibles are open or active in PocketBible at the time. To accomplish this, I’m taking advantage of the “Autostudy Today” feature of the Advanced Feature Set.
Autostudy Today lets you collect the Bible passages and devotional passages you want to read for the day in an HTML or PDF file that can be viewed either within PocketBible or externally. It also lets you customize the styles that are used in the Autostudy output according to your preferences. Most people don’t bother with this, but I’m not most people. 🙂
If you don’t already own the Advanced Feature Set, it can be purchased as a subscription for $9.99/year. This particular feature is only available in the iOS, Android, and Mac OS versions of PocketBible. I’ll be using the Mac OS version to read from and to demonstrate these features, but the iOS and Android versions are similar.
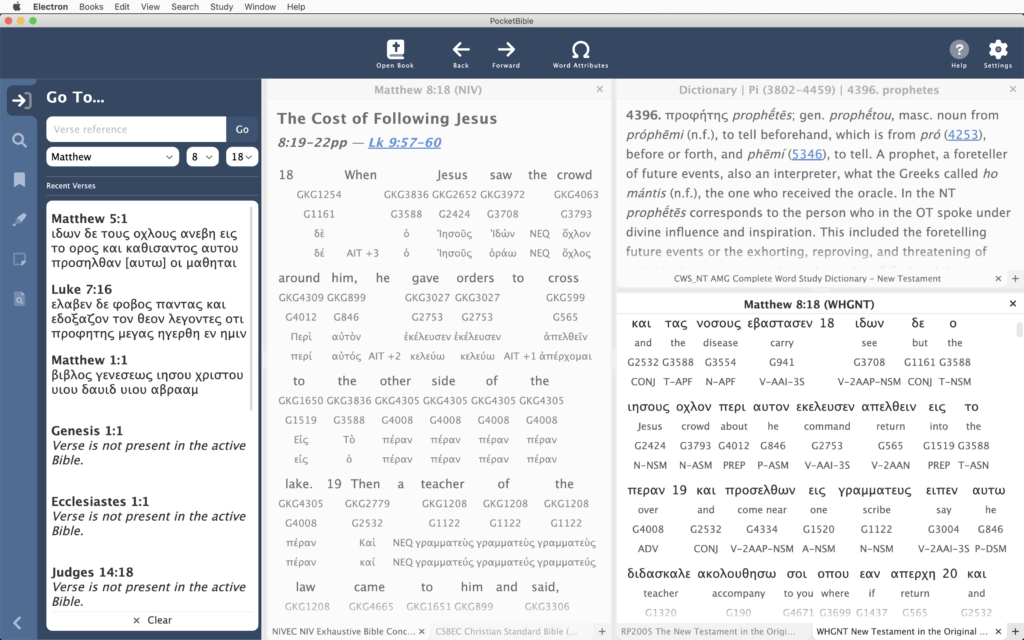
To make it easier to do this every day, I right-click on the toolbar, choose Customize Toolbar, then drag the Today Study button onto the toolbar. That will give me one-touch access to my reading each day.
Drag Today Study to the toolbar.
On the Autostudy Today screen I can select which books to include in the Autostudy report each day. Since the particular devotional book I’m using is just a reading plan and doesn’t itself contain any text I need to read, I’m going to un-check the Devotionals checkbox and make sure Bibles is checked.
Deselect Devotionals; select Bibles.
Then I click on Devotionals (not the checkbox, but on the word “Devotionals” so that it is selected. This causes a list of all my installed devotionals to be displayed on the right. I choose the None button under that list to deselect all the devotionals, then find my Old Testament in 1 Year and New Testament in 1 Year reading plans and select their check boxes to include them in the Autostudy output.
Since I want my Old Testament reading to come first each day, I drag the Old Testement in 1 Year plan up above the New Testament in 1 Year plan. It doesn’t matter if there are other books in between, since they won’t be included. I just want to make sure the OT comes before the NT.
Drag the Old Testament devotional to a position above the New Testament devotional.
Now I select Bibles from the list on the left, causing my list of installed Bibles to be displayed on the right. Again I choose None to deselect all Bibles, then find the Bible I want to read from and select its checkbox. I’ll be reading from the Christian Standard Bible this year, so I select that one.
Select the Bible from which you want to read and deselect all others.
At this point I can test my output by selecting View. I’ll get the scheduled readings for whatever day happened to be selected on the calendar. The output looks just as I would expect, but I’m not entirely happy with it. I’m going to make a few changes to enhance the appearance of the text.
Back on the Autostudy Today screen, I have an option to edit the “style sheet” for the Autostudy report. Don’t be embarrassed if this looks intimidating. Most people don’t know anything about editing Cascading Style Sheets. At the same time, don’t be afraid to try this at home. You can always reset it to defaults and start over if you mess something up.
The style sheet controls how every element of the Autostudy report is formatted. I want to make a number of changes to what my text looks like:
Change the color of the Bible reference headings above each passage, and put them on a line of their own above the text instead of inline with the text.
Add some additional leading between the lines of text.
Make adjustments to how poetry is displayed.
Suppress verse numbers in the Bible text.
To change the color of the Bible reference headings, I need to locate the line that looks like this:
This line controls the Bible reference headings. By default, the text in a div element appears on its own line. PocketBible overrides this behavior by including display:inline in the style definition for Bible references. So I want to delete display:inline and the semicolon that follows it. I also delete float:left and the semicolon that follows that.
I’m not fond of the light shade of blue that PocketBible uses for Bible reference headings, so I change color:00c to color:008. This is a slightly darker shade of blue. I could instead change it to color:000 (or remove the color:00c attribute entirely) to make it black.
Next, I want to add some additional space between the lines (sometimes referred to as line leading). This is done by editing the entry that looks like this:
p {margin:0px 0px 0.5em 0px}
CSS style sheets use the line-height attribute to control line leading. A value of 100% is supposed to be “normal height”, and back in 2003 when I wrote my own HTML rendering engine, I made it work that way. But because the programmers who created the Web are not as smart as I, you actually need to set it to about 120% to get natural spacing for most fonts. I want a little extra space, so I’m going to set it to 150% by changing this line to read as follows:
p {margin:0px 0px 0.5em 0px; line-height:150%}
The p element is used for normal paragraphs in the Bible text. We also have poetry sections, for which PocketBible (arguably incorrectly) uses the blockquote tag to create extra margin on the left and right. There is no style specified for the blockquote tag in the default Autostudy style sheet (don’t ask me why; I don’t have an answer), so we just add the following line anywhere in the style sheet. I added it below the line for the p element, above.
This tightens up the line spacing a little bit in the poetry sections, and indents it a little more than normal paragraphs (about the width of one character).
Finally, we want to suppress verse numbers in the text. I happen to know that PocketBible uses the sup and small tags to superscript the verse numbers. Adding the following line to the CSS file (I added it below blockquote) causes superscripted text to be ignored:
sup {display:none}
That’s it! Once I save my changes to the CSS I’m ready to view the output.
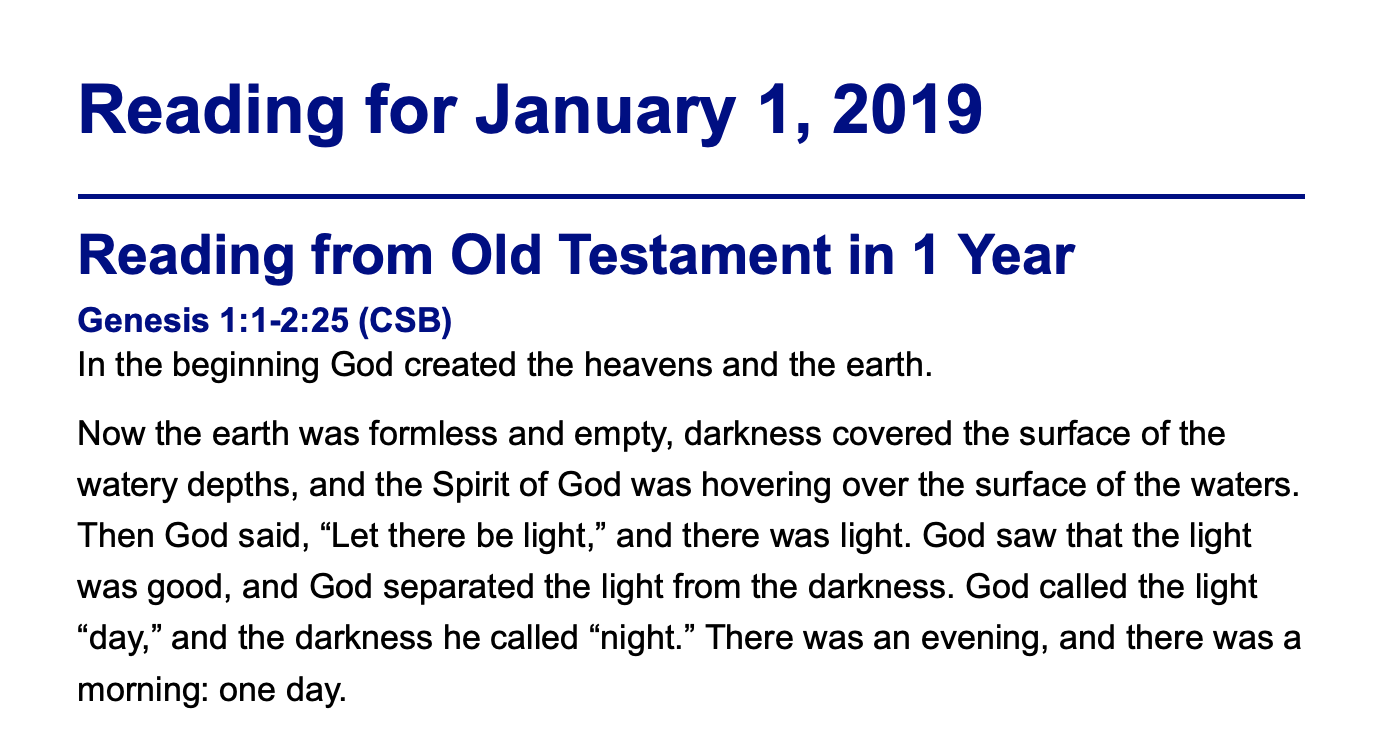
All I need to do each day is choose the Today Study button from the toolbar, then press View to view my text for the day. I like to choose Print, then PDF, then Open in Preview to get a full-screen, PDF view of the text to read.
When I’m done reading, I mark today’s reading as complete in each of the OT and NT devotional books in PocketBible.
This is an old article but the general idea still works not just for Kindle, but for installing PocketBible for Android onto any Android device from our website instead of from Google Play.
If you have the option of using Google Play on your device – even if it didn’t come with it already installed – that is the easiest way to install PocketBible. But if you must do a manual installation of PocketBible, this is how you do it.
You need to make sure you’ve enabled “third party apps” on your Kindle. Go to Settings and look for “Device” (it may be in the “More…” menu). Look for “Allow Installation of Applications” and turn it on. On the HDX, this option is under Applications in Settings. You’ll get a warning message but that’s OK – they’re just trying to scare you into only buying software from Amazon. 🙂
For newer Kindle devices, swipe down from the top and select Settings. Under Personal select the option for Security. Under Advanced select the option to enable Apps from Unknown Sources and accept the security warning.
Once you’ve done that, just go to the Web browser on the Kindle and type in this:
https://LPB.cc/pbsideload
PocketBible should automatically download. On some devices, you’ll be prompted to install the app but on the Kindle devices, you’ll have a few more steps
Original Kindle Fire and HD: You may have to tap the notification number next to your name in the upper left corner of the screen. You will then see a list of notifications. One of them should say something like com.laridian.pocketbible or pocketbible.apk and “download complete”. Select that one. You’ll be asked if you want to install PocketBible and it will ask if you want to allow PocketBible to use network communications and some other things. Choose the “install” button and when it’s done choose “open”.
Kindle Fire HDX: After you download from the Silk Browser, tap on the menu icon in the top left corner. Choose the Downloads option and you should see PocketBible.apk listed there. Tap on it and choose the install option to finish the process. If you prefer, you can watch of video of this.
On newer Kindle devices we have found that you may not be able to just tap on the downloaded file after it is downloaded, but rather you need to go to the File Explorer (or Kindle equivalent thereof), locate your Downloads folder, then locate the downloaded apk file for PocketBible and select it there to run it.
Once PocketBible is installed you can choose it from the carousel like any other program. The PocketBible icon may look “blurry” but that’s OK — Amazon uses low-resolution icons for third-party apps because they’re upset that you didn’t give them any money to run the software on their device, so they want to make you think there’s something less than professional about our app. 🙂
Once again, if you have the option to install Google Play on your Kindle or other Android device, that is the easiest way to install PocketBible. We can’t help you do this because of the large variety of Android devices out there, but if you google it you should find instructions for installing Google Play on your particular device.